

How to create your own Custom Terminal Commands
Boost your productivity by creating bash commands for recurring tasks and automating your workflows


In this article, we will see how we can create custom shell commands for automating our tasks which will help focus on other productive things by saving our time. It’s easy to set up and also a lot of fun as we can create any custom commands from highly useful to just for fun ones. We can create one single command for things like:
Converting a youtube video to mp3
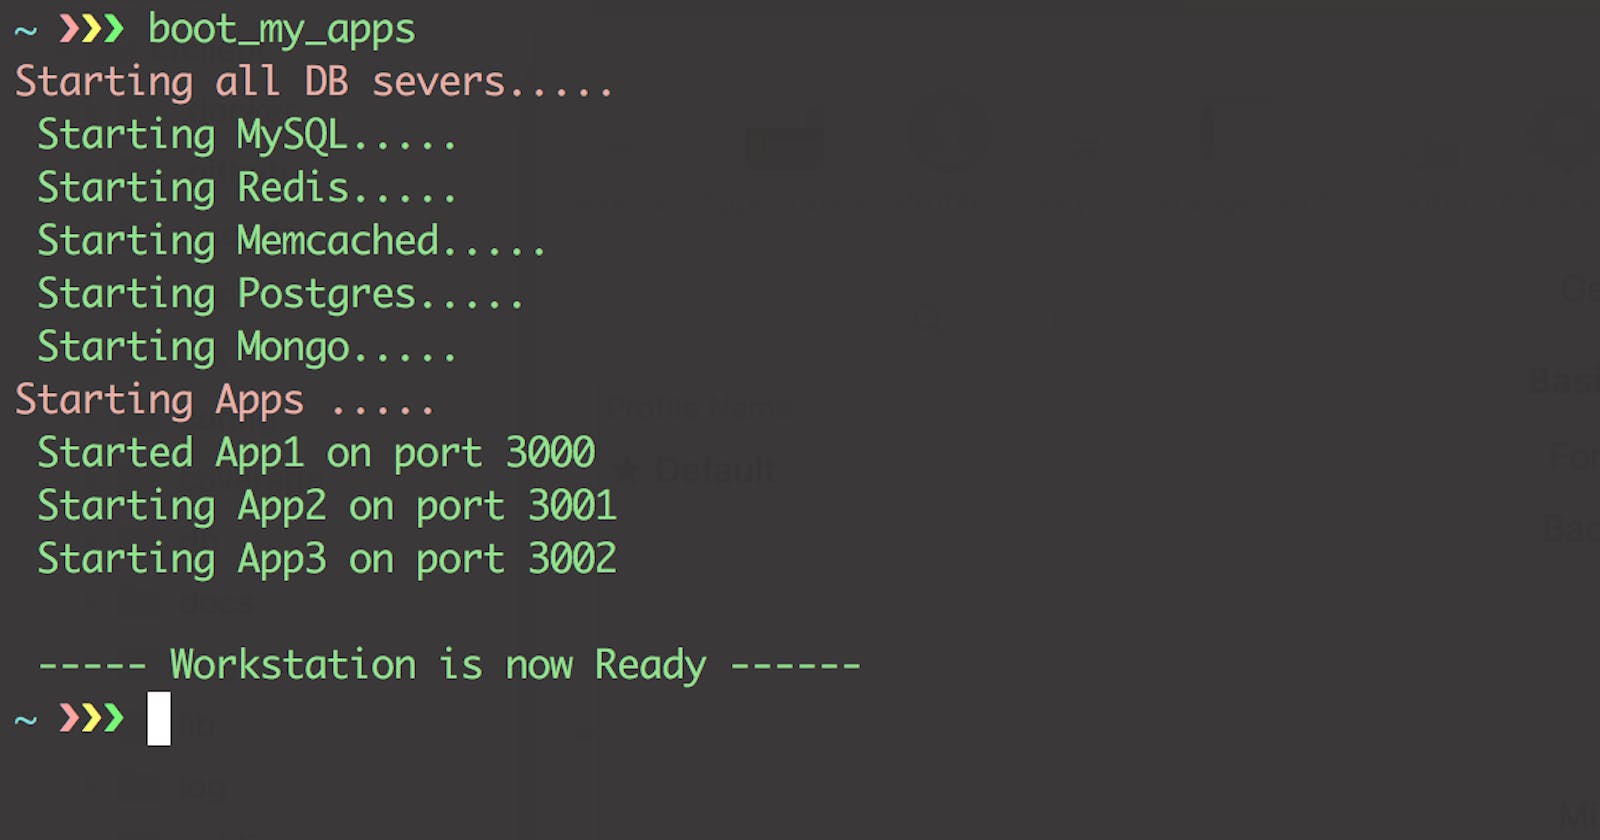
Starting all database servers and all your apps with a single command using Tmuxinator
Extracting some information from a website
Fetching git ssh key from Github username and copying it in the clipboard
Getting details about top 5 programs consuming excessive RAM/CPU and so on.
Custom commands are basically some function/method like any other programming language which do some stuff and may or may not take inputs. We can stack up as many commands as we want inside a function which will then run on the function call. More details on writing functions and setting up to use inside a terminal as a command has been shared below. The example given below will work on any UNIX-based systems.
Let’s start off with a simple example of creating a custom command and making the command available in the Terminal.
Step 1: Know the basic structure for writing a function in Shell
Here is a sample:
function print_my_input() {
 echo 'Your input: ' $1
}
If you send some input to the function, the first parameter gets stored in $1 variable, the second parameter in $2, and so on.
Copy and paste the above function in your terminal and try calling the function like this:
print_my_input 'Just trying out my new command'
The output should be:
Your input: Just trying out my new command
Step 2: Saving your custom commands
2.1 We will create a new bash script file where we will be keeping all of our commands.
We will make it a hidden file by appending a dot(.) in front of the filename as it will be only used by the terminal and it also prevents accidental deletion.
Let’s go to the home directory (~) in our terminal. cd ~ will take you there. Now, create a new bash script by using the following command:
touch .my_custom_commands.sh
Now open the above file in any text editor and paste the following code and save it.
#!/bin/bash

# prints the input
function print_my_input() {
  echo 'Your input: ' $1
}
The first line is a convention used while writing Shell scripts which gives information to the Shell for using the appropriate interpreter. e.g.
#!/usr/bin/env python#is used for writing comments
2.2 Setting up file permissions
By default, a newly created file has only read permission. Since we only need to load our file into the Shell, read permission will be enough for us which is already there. So, we don’t need to alter the permission of our file during this session.
But just for the knowledge, you can try executing the script using the command in this format ./{{script_name}} i.e. ./.my_custom_command.sh in our case. You will see a “permission denied” message.
However, if there was a need to run the script explicitly through the terminal like above, we would set “executable” permission to the file using the following command:
chmod +x .my_custom_commands.sh
2.3 Making sure that our command available in the Terminal
Remember, we had pasted our function print_my_input in the terminal and tried to run it? This will make the command(which is just a function/method actually) available to the current terminal session for that particular tab only. If you try opening a new tab and execute the command, it won’t be there.
Let’s look into how we can load our command in any terminal session. Our file is already there, saved, and ready. Let’s start from fresh.
Quit the terminal and start a new one and go to the home directory.
Check if this
print_my_inputcommands works or not. It should not work now.Now, load the file content using the
sourcecommand like this:source ~/.my_custom_commands.shNow try typing
print_my_inputcommand and hit enter.It works right? Now, we have to instruct the terminal to load the content of our script in each terminal session. We do that by adding the command for loading the script in a
rc(Run Control) file of the Shell. The shell loads/executes all the commands inside the run control file during each interactive shell launch.
Bash is the default shell for almost all UNIX-based systems. However, different flavors like ZSH are also there. Based on the shell we are using, we will modify either ~/.bashrc or ~/.zshrc file. If you don’t have an idea about this, just go for the ~/.bashrc file. Note that I am using the full path while describing these files.
Adding our command to the rc files:
Open
~/.bashrcor~/.zshrcusing any text editor you haveAdd the following command after the last line or anywhere you want
source ~/.my_custom_commands.shSave the file after adding the new line and exit the terminal
Since, we have already instructed the terminal to load our file on each terminal session, try this command
print_my_inputin the current tab and also by opening a new tab. It should be working everywhere even when we exit and start a new terminal.
Congratulations!! You are now ready to build your own custom command!
This is just the beginning. You can dive deeper into shell scripting, how to use variables, loops, if conditions, and create new commands, and keep on adding new functions in this(my_custom_commands.sh) file.
Here is a handy custom command which I made recently for downloading mp3 from a public YouTube video URL.
# converts and saves youtube video to mp3
function convert_to_mp3() {
  youtube-dl --extract-audio --audio-format mp3 $1
}
You must install youtube-dl and ffmpeg libraries first if you don’t have it. Then, copy the following function in the custom commands file. Reload terminal or go to a new tab and try the command like below:
convert_to_mp3 'https://youtube.com/{{youtube_url_of_some_song}}'
Try updating the library by doing youtube-dl -U if you already have it and is throwing some error.